I've finally finished taking pics for this tutorial yesterday, but was interrupted by dinner plans and catch up sesh with my cousins last night I couldn't write up the tutorial!
So this look is from T-Ara Hyomin's Roly Poly look below...


Her eye make up close up (left), Her comeback performance - the picture flushed out her red lipstick (right)
When I first saw their first Roly Poly comeback performance, I was mesmerized by how gorgeous she looked and how her make up was so simple made her look like a goddess (totally girl crushing).
So let's get on with the tutorial shall we?
Please note that I'll only be showing you how to do her eye makeup.
WARNING! PHOTO SPAM AHEAD!
What I've used in this Tutorial:
♥ Olive (Wings) Brown Circle Lens (GEO)
♥ Apricot Frost Creme Shadow (no brand)
♥ Anaconda Super Silky Shadow (no brand)
♥ 425 Dawning Gold (Max Factor)
♥ Killer Black Pen Liner (CLIO)
♥ Zero Black 24/7 Glide-on Pencil (Urban Decay)
♥ 071 Pure White Soft Kohl Eye Liner (Rimmel)
♥ Black Super Dolly Powerful Mascara (SASA)
♥ Ultra Black The Max VolumeFlash Mascara (Rimmel)
♥ Blaze Red Lipstick (no brand)


Apricot Frost (left), Applying from top lash line to crease (right)
1. After you do your basics (foundation, conceal, blush, contour), grab a shimmer peachy/apricot colour creme shadow to use as your base. I've been going to this beauty clinic which sell these no brand make up and it's THE BEST (it's long lasting, doesn't wear off too fast which is great), for this first step, I'm using their "Apricot Frost" creme shadow which gives off a shimmer effect with tints of peach/apricot colour. Start applying on your lids (generally from your lash line to your crease.. if you have smaller lids, going above your crease is fine).


Anaconda (left), Patting on the eye shadow with one finger (right)


Max Factor Dawning Gold (left), Gliding on eyeshadow up to crease (right)


CLIO Killer Black Pen Liner (left), Drawing the wing about 2.5cm towards eyebrow ends (right)

Your line should look long (above)


Urban Decay 24/7 Glide-on eye liner pencil (left), 0.5cm from wing towards middle of eye - follow the red line (right)


Rimmel Pure White eye liner (left), After lining the lower water line (right)

Smudge and blend the gold underneath your lower lashes (right)
7. Take your gold eye shadow again, and smudge below your lashes from your inner corners towards the center and blend it out.


SASA branded mascara (left), My crappy diagram of the lower lashes (right)

Super happy that I've finished my eyes!!!

Blaze lipstick on :D

My result!!!

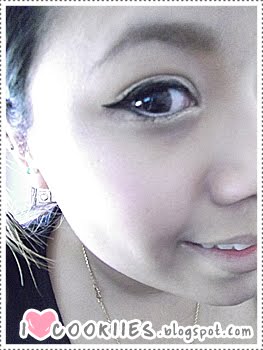
A close up - looks silver I know, but it's hard to capture the right colour on camera

Closer pic of my eye - see the lower lashes? :D

Used this as my sneak pic on Twitter :P FOLLOW ME PLEASE :D
And that's it! I hope you like the tutorial! Please let me know your thoughts and suggestions, I would really love to hear from you - pretty much give me comments.. I ♥ Comments!
This look is just an inspired look - this most likely not the exact way of how Hyomin's make up artist applied her make up or even the colours used. I'm just improvising with what I have to create a similar look.
Looks amazing!!
ReplyDeleteIt turned out really nice on the night too! Cute hints of flutter blush as well as that amazibg lippy colour!
Would love to get one of those!
thanks for the tutorial~^^ I love your eyemake <3
ReplyDeletebtw,I'm having GIVEAWAY on my blog. Hope you want to check it. the prize would be 5 korean BB creams and 5 Cleansers from Luview ^^ thx~
here's the link: http://sparkleapple.blogspot.com/2011/08/luview-cosmetics-giveaway.htm
@Lina Kim ♥ Thanks for letting me know about your giveaway!! I'll definately check it out after work ;)
ReplyDelete@kerplouski Thanks Fi!!! I could buy the lipstick for you if you want? The place I'm getting it from has a 50% off make up :P I'm heading there on Saturday so I can get one for you? Let me know ♥ xx
Those Lens makes your eyeballs huge!
ReplyDelete@Anonymous Thanks Anon! I know they do right??? But I'm used to seeing myself with lenses ahahha I look weird without :/
ReplyDeleteHi Joeyy, thx for your comment! and you're right!!! the peeling gel looks like a mashed potatoes! MWAHAHA...
ReplyDelete