I thought I'd share with you a simple Silver Black Smokey Eyes tutorial! This is what I wore on Saturday night (03 Sept 11) for an event that required me to wear something blue... Though, I could have just done blue make up, but I was already wearing a navy blue top, painted my nails blue as well as wearing blue earrings - I didn't want to over do the blue if you see where I was going. So I just stuck with a simple smokey eyes plus fuchsia lipstick. See below for the eye look.

WARNING - PIC SPAM AHEAD!!
What I've Used:
♥ Olive (Wings) Grey (GEO)
♥ Tri Smokey (Kate)
♥ Indelible Brows Natural Taupe (Private Label)
♥ Lashes (Unknown)
♥ Indelible Creme Eye Shadow Intergalactic (Private Label)
♥ Black Eyeshadow (Etude House)
♥ Fuchsia Fusion (Revlon)
♥ Killer Black Pen (CLIO)

Creme Eye Shadow Intergalactic (Silver)


I don't know the name of this particular eye shadow, but I love it as the black stands out A LOT.


BLEND BLEND BLEND


Look at it glitter and sparkle with flash - yes, that Kate eye shadow kit was glittery, doesn't it look awesome?? :D

Here's a pic of my other eye as my right eye was constantly in the light so it was hard to see how dark I've actually applied the black.


Doesn't my eye look freaky with flash? ahahaha downside of wearing contacts >_<

CAMWHORE TIME ♥
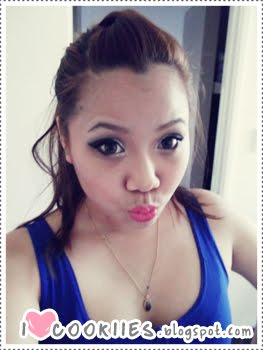


Trying to re-live the moment by wearing blue.. Sorry Narelle, I lied, I found another blue top ahahah
Pics after a night of partying
Okay, I thought I'd share how super awesome the creme eye shadow really was. I was told it was smudge, budge and water proof, and they were RIGHT! These are pics taken after 5 hours of partying and LOOK! The silver is still in place!! The black was running but THAT'S OKAY! If I could find black creme shadow or even grey, I'd totally BUY IT! Oh, by the way, I am selling the same brand on iCandy Style Lens if you were planning on purchasing it - thought I'm not selling the Intergalactic as they had no stock....


On that night I actually did it slightly different to what I've mentioned in this tutorial I've used more silver and made it more like the < sign. Sorry about my eyes, they're slightly red as I was tired and ready to jump into bed after removing my make up.
Have I convinced you yet??? See more below :D
MORE PICS FROM THE NIGHT


Btw, this look looks great with Fuchsia Lipstick ♥
FORGOTTEN PURCHASES
Okay so while uploading the tutorial pics on my comp, I found THESE PICS!! Totally forgot I had these and I forgot to blog about them when I promised I would too!!


When I purchased my Dolly Wink lashes, I also purchased a polaroid!! I'm such an impulse buyer!! If I like it I buy it - no holding back O_O mind you, this was purchased last month.. You'll know I'm crazy when I reveal what I bought near the end of the post O_O This cost me about $280 AUD for the Fuji Film Instax Mini 50s (it only comes in Piano Black - it looks so sexy), and 40 film (I think - or was it 50 o.o). The Ebay seller also threw in a Disney Polaroid Film Album - glad I got stitch ♥

The chick on the box looks a bit like AngelaBaby o.o ... unless IT IS?!

Look how adorable he looks sitting on a pink moooooooon XD
Lookie at what I stumbled across.....................

It's my fav doggie in the world!! My cookie ♥♥
So if you're wondering wtf she's doing, as you can see there's one of those prickle things on her face (so many crap gets stuck on her face it's not funny.. Not even her face but her whole body as she's just wool and fluff - so hard to groom her sometimes). I was tapping the prickle and telling her that there's a prickle on her face and what does she do? She licks the otherside =_= what a dumbass................. My gorgeous dumbass :D
Now that all THAT has been shared, I'd like to share with you some distressing news... I'm broke.... Yup, that's right! As you can tell, I'm a VERY VERY VERY bad saver =_= last Thursday and Friday I spent a total of $560 AUD or even more o.o not only that, I'm going to Malaysia this Saturday!! So this week, I'm trying my very best to save what I have left and what I'll get from this weeks pay as I'm only in Malaysia for 3 days (for my cousin's wedding... I'll make a post about that next week with pics of make up and what I wore). When I'm in Malaysia, I tend to spend up to $400AUD a day as that's the only place I can buy my shoes from (besides from online shopping) as the shoe stores here in Perth don't have my tiny feet size :( I fit a size 4-5 in Malaysia, usually a size 4... And I fit a size 5 here.. I wish I had bigger feet >_< I look weird wearing steel cap boots at work as they make me look like I have a short but tall foot =_= don't even ask where I work -.-
Anywho, let's hope I don't over spend when I go there!! As I only bought 20kg baggage return!
Wish me luck, and remember to keep smiling!!~~~

Damn, I need that silver!!! this is a great look on you, really extends your eyes a lot!
ReplyDeletemore pics from the night load: middle row, right!! (;
ReplyDeletehave fun in msia! congratulate her for me and send her my love!! (:
thanks for the tutorial :D
ReplyDeletethe silver looks awesome!! *-*
your cookie, she's so cute!! and thanks for the tutorial =D
ReplyDeletesooo pretty! :D
ReplyDeleteYou have really great eyes for this look! Thanks for the tutorial!
ReplyDeleteHi Sweetie cool makeup but I have a question, what happen with your eyebrows?? Weel don´t care is just my opinon.
ReplyDeleteNice blog and post God Bless you~~
Sakuranko Blog
My Facebook Page Fan
love this makeup look!
ReplyDelete@CottonCandyINK.blogspot.com
Love how you did your eye makeup, you look so sweet! :)
ReplyDeletexoxo,
Addie
The Cat Hag
That's some badass eyeshadow! Mine always smudges, creases, gets under my eyebags,.. :')
ReplyDeleteI love your lenses, they work so well with the make up <3